

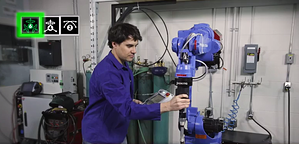
 Here are two new videos showing you how to create, import and export jobs with Kinetiq Teaching. The second video demonstrates some different motions types, adjustments and control options. You might think that this must be complicated, but it's actually quite simple with our touch-screen intuitive interface. These videos will definitely help you to have more precision, control and efficiency with the Kinetiq Teaching Welding Solution.
How to Create, Import and Export Jobs with Kinetiq Teaching:
Creating New Jobs:
- Turn the Kinetiq Teaching Mode off
- Select the tab [FILE] in the Instruction Parameter section
- Select [NEW JOB]
- Your new job has been created
Importing Jobs
- Turn the Kinetiq Teaching Mode off
- Select the tab [FILE] in the Instruction Parameter section
- Select [IMPORT JOB]
- Select your job file
- Select [OK]
- Your INFORM job has been imported
Exporting Jobs
- Turn the Kinetiq Teaching Mode off
- Select the tab [FILE] in the Instruction Parameter section
- Select the Job, name the field and edit it
- Select [ENTER]
- Select [EXPORT JOB]
- Your INFORM job has been exported to the compact flash card
Its simple and easy and your program has been created. Adjustments are just as easy.
Motions Types and Adjustments - The Control Options
The Control Options
- Control tool box is in the upper left hand corner of the teach pendant screen
- Select [6-AXIS MOTION] to move in any direction
- Select [4-AXIS MOTION] to move in translation and rotation directions only
- Select the [2-AXIS MOTION] to rotate only around the tip
Adjust Speed and Sensitivity of the Robot
- The speed icon shows the hand-guiding speed status
- Press on [FAST] to increase the hand-guiding speed
- Press on [SLOW] to reduce the hand-guiding speed


Leave a comment