

 All the Robotiq Adaptive Grippers have a built-in object detection function. In fact, this article will present to you the main points on this device and will show you how to read and interpret the data used for object detection. You should notice that it is a built-in function on all our Robot Grippers, so no additional tasks or programming lines need to be added to the robot program.
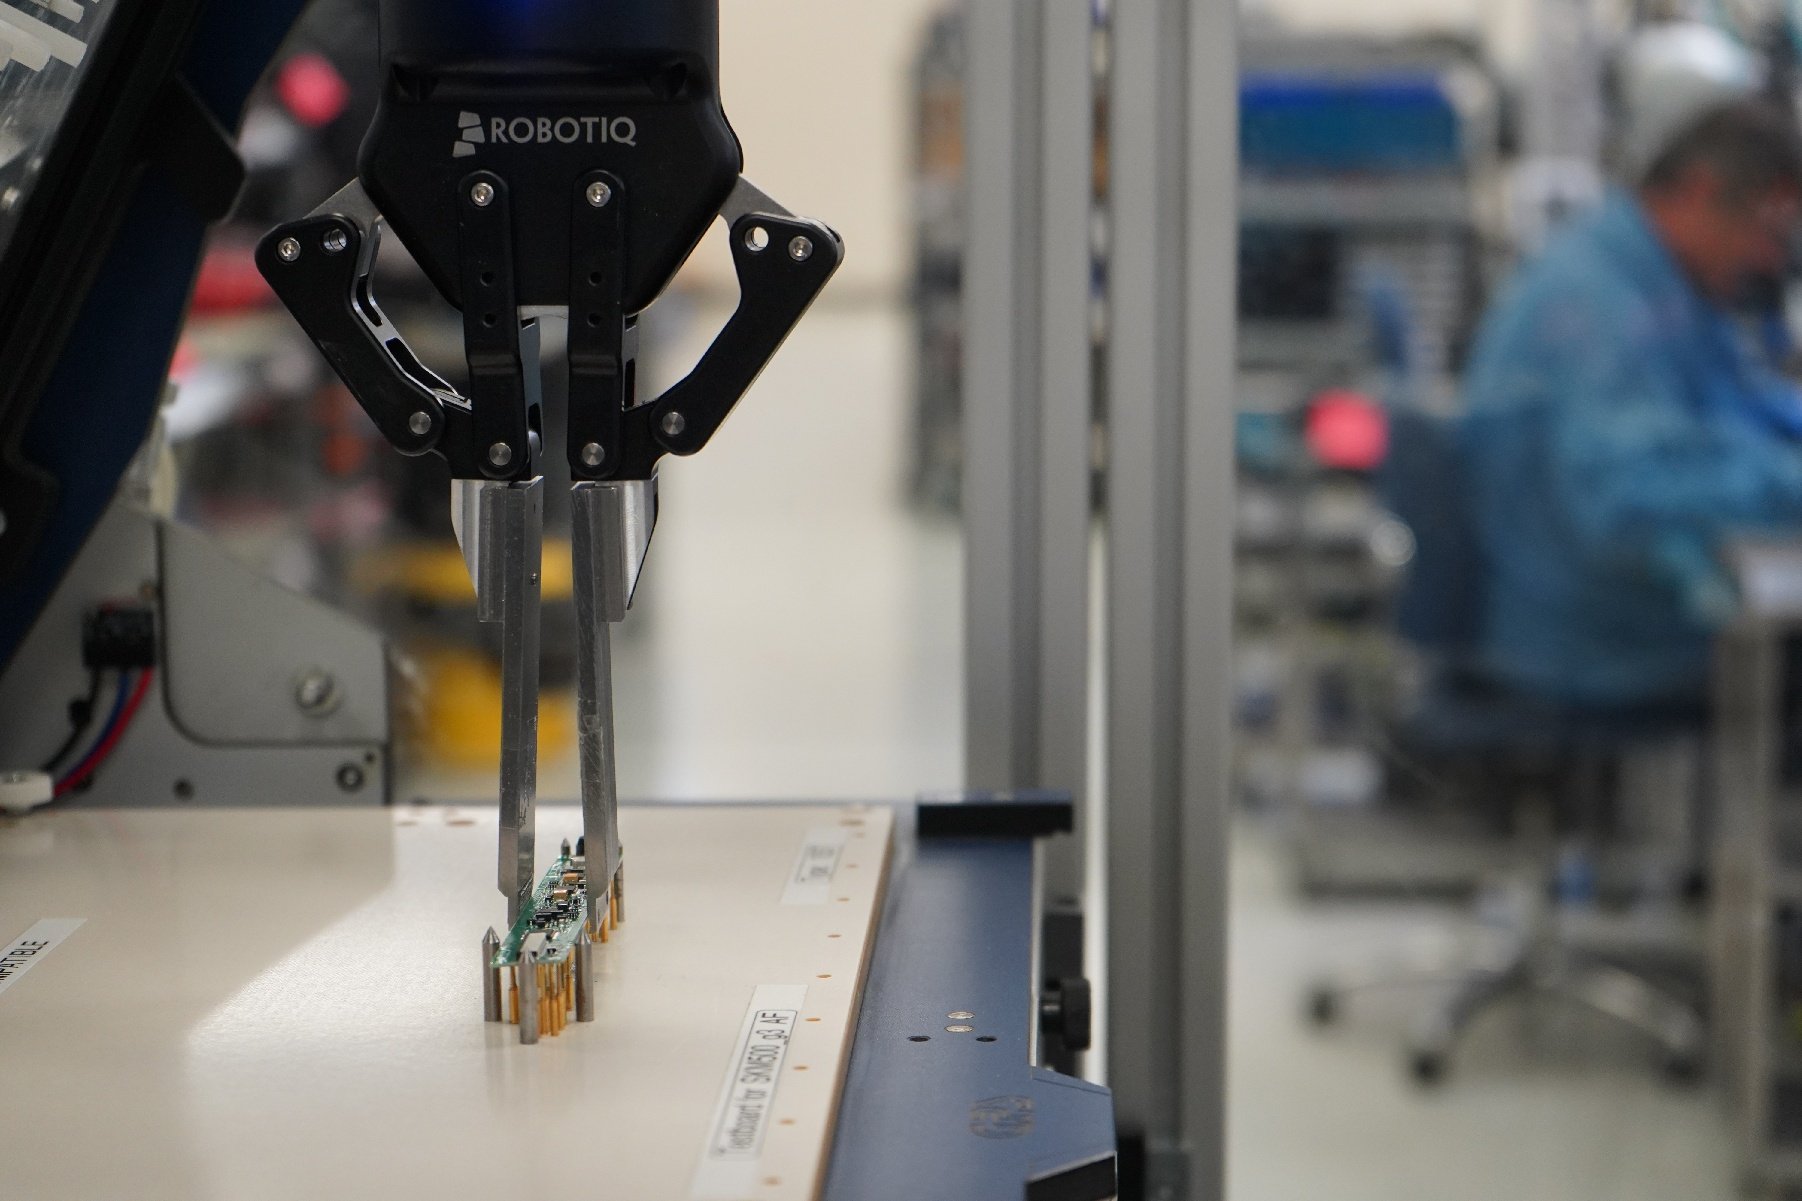
Object Detection Generalities for Robot Grippers
The Grippers are force, speed and position limited. Force limited means that when the fingers detect a given amount of force (ie. an object) the motor stops. The speed limitation is basically the maximum speed that the fingers will reach during their motion. The position limitation means that the fingers stop when the given position is reached. These two characteristics (force and position) interact one with the other. In fact, if the user asks for a certain position from the fingers and sets a certain amount of force, the first of the 2 variables that is reached will determine the end position of the fingers. This is why it is called adaptive, it can adapt to changing geometry. For example, if an object is bigger than it is supposed to be, the fingers will hit the object first and will force against it. Since the position target is not reached, but the force is reached, then the Robot Gripper’s motor will stop forcing against the object and will enter the self-locking mode.
In another instance, if your applications need to grasp a fragile object, you may want to reduce the force limitation value and have a very precise position value, so that the Robot Gripper will force against the object at a minimal force at exactly the right spot.
Now that you know how Object Detection works, there are a couple of things that should be considered when programming a Robotiq Gripper.
-
To reduce the measuring or setup time, program the Robotic Gripper to close at its maximum position (255 bits). With a given force limitation the Gripper will close until it reaches its maximum force. In other words, if you don't know what you are going to grasp, program the Gripper to close completely and it will stop when the object is grasped. Once the object is detected, the Gripper will tell the robot that an object has been detected.
Although you should note that by using this technique, thin objects cannot be detected. In fact, objects that are smaller than 2mm are tough to detect. If the part is very thin, the Gripper will be fully closed and will ''detect'' a force, so it will tell the robot it is ready for further steps. -
When the shape of the object is known, you may want to enhance your grasping performance by placing the Gripper at an intermediate position. If the object is less than 50mm for example, you don't have to fully open the... say 2-Finger Gripper - 85mm to grasp the object. Measure the width of the object and set your Gripper consequently.
-
Once again, you don't have to build a homemade program to detect objects. The Gripper is made to do such tasks. If we analyze the whole process, the Robot Gripper approaches the part to grasp with the Gripper in its ready position. As the Gripper is closing around the part, a constant reading is done in the registry at a recommended rate of 100Hz. If the program reads ''0'', the object hasn't been detected yet. Once the object is detected, the bit switches to ''1'' and the robot can now move to its subsequent operation.
The following diagram shows how the detection is made:

Most robot grippers don't have object detection devices. This means that the gripper is closing and has to wait until a certain amount of time has passed to make sure the object has been grasp. It can then continue to the next step of its routine. The Robotiq Gripper can detect the object and tell you the object is grasped. You can then go to the next step without waiting and losing precious time.
Overview
To have information on the Robot Gripper's configuration, the following statuses have to be considered.
-
Global Gripper Status - A global Gripper status is available. This gives information such as if the Gripper is closed or open.
-
Object Status - There is also an object status that lets you know if there is an object in the Gripper.
-
Fault Status - The fault status gives additional detail about the cause of a fault or warnings about the current controller status.
-
Position Request Echo - The Gripper returns to the position requested by the robot to make sure that the new command has been received correctly.
-
Motor Position Status - The information of the motor position is also available.
-
Current Status - The current of the motor can also be known. The force applied at the actuation linkage of the finger can be known from the current, since the torque of the motor is a linear function of the current.
The Gripper controller has an internal memory that is shared with the robot controller. One part of the memory is for robot output / Gripper functionalities. The other part of the memory is for the robot input / Gripper status. Two types of actions can thus be done by the robot controller:
-
Write in the robot output registers to activate functionalities;
-
Read in the robot input registers to get the status of the Gripper.
Functionalities
When looking at the specific output that needs to be configure for the detection of an object: position, speed and force, the following register needs to be set. These registers are specific to the action that is to be done by the Gripper.
Register: POSITION REQUEST
Address: Byte 3

Register: SPEED
Address: Byte 4

Notice that the 0x00 speed doesn't mean an absolute zero speed, it sets the minimum Gripper speed.
Register: FORCE
Address: Byte 5

Knowing these parameters, you can now set a certain position, speed and force to grasp a certain object. Even though, you don’t have any information about whether or not the Gripper has grasped the object. This is why you need to check the different statuses. These statuses give you feedback for the Robot Gripper.
Status
Checking the correct position of the fingers (byte 4) and object detection (byte 0, bit 6 & 7) before proceeding to the next step of a routine is a more reliable method than object detection or finger position alone.
Register: POSITION
Address: Byte 4
![]()
Register: GRIPPER STATUS
Address: Byte 0

This article discussed the specific case of object detection, though you may want to check your instruction manual to get further information regarding our Grippers. Hopefully this helped you and gave you a clearer idea of what object detection is all about.


.jpg)

Leave a comment