What You Need to Look for in Machine Tending Automation

Posted on Mar 11, 2014 in Automation
6 min read time
In industrial automation, when it’s time to automate a process it’s sometimes hard to know where to begin. There are plenty of systems integration companies that offer off-the-shelf kits for specific applications, but what if your application is different? What if you want to build your own custom cell? This article will give you some tips about what to look for in machine tending. As all machines, robots, programming tools and applications are different, I will explain this subject using general terms. This article uses a complete machine tending loop as the example.
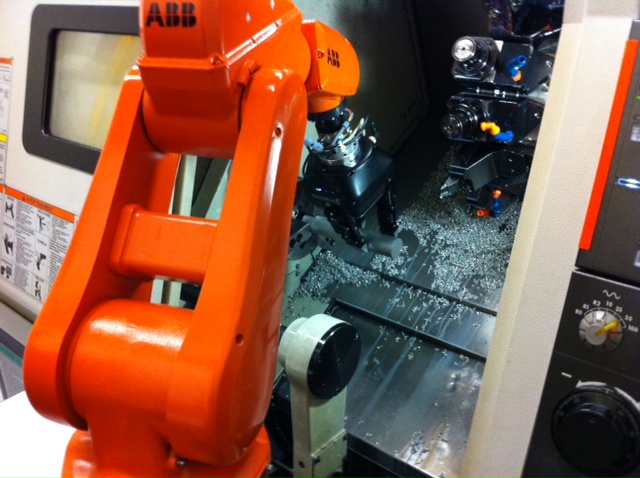
Part Ordering: Mixed-up or Classified?
When an industrial robot needs to grab a raw part, localization needs to be given to the robot so that it can grab the part correctly. There are two general ways to structure the parts that need to be machined. First of all, a classified racking system can be used. In fact, if the parts are classified in a certain way, so that the robot knows exactly where the part is, then coordinates for the parts are easier to program. By using this system, a certain amount of time and effort has to be put into the design of the racking. If the parts that are going into the machine will remain the same over a long period of time, there is no need to think about flexibility. Although, if the production needs to be changed and a new raw part needs to be classified, it’s a real puzzle to design a racking that can fit every raw material. Here’s a video on how to order raw material using rigid racking methods.
The second way to order your raw material is by using vision. Depending on the size of the parts that must be machined, a conveyor, a bin or a drawer can be used for placing parts. Since the parts are not positioned at a precise position, a vision system needs to be paired with the robot program. By taking a photo, the system knows exactly where to pick up the part. If the system needs to be dynamic, an encoder on a conveyor can be paired to the vision system and the robot(s) will know precisely where to pick up the raw part even while it’s moving. Here’s a video that shows how to order raw material using a vision system.
Prehension: End Effector Grip Force, Payload, Shape…
Prehension is probably the most complicated method of the machine tending process. In fact, prehension includes the choice of an end-effector and robot. You need to know what kind of parts can possibly be handled in the cell. You also need to ask yourself if the cell will be dedicated to a single product or if the production will change every month for example. This criteria will decide the size of your component (Grip force and payload needed) and if you will need a flexible or rigid cell. In fact, you can use a 2 position gripper for a production that will stay steady for years. On the other hand, you want to use a flexible robot gripper for production that changes relatively often. Grippers like our 2-Finger Adaptive Robot Gripper and even 3-Finger Adaptive Robot Gripper are ideal for flexible application.
Don’t forget to check if the grip force and payload of the gripper and the robot are appropriate for your machine tending. Consider having a double gripper so you can exchange parts faster in the machine. Don’t forget your number of setups. Having several setups for the same parts requires you to have a gripper that can handle the same parts, but with different characteristics.
Movement: Speed vs. Precision
When thinking about machine tending, most people are obviously thinking about fast production. However, don’t forget that being too fast is often a synonym of lack of quality. The speed of the different movements of the robot needs to be correct for each step. Normally, the prehension operations are done very slowly. In doing so, the gripper can take the parts very precisely and apply the correct amount of pressure on the part. The motions from outside the machine to near the machine vise can be executed with a relatively fast speed. The insertion of the part into the vise needs to be done with caution (which means slow speed!) Be careful in putting the part in the right position—you don’t want the part to be inserted too fast and therefore be mispositioned. Here’s an example of precision machine tending.
Vise
Even if it seems fairly simple, the vise inside the machine needs to be precise and adjusted to the parts that are machined. Most vises are equipped with a pneumatic or hydraulic system that keep the part in place during the machining operations.
Moving out!
As the part is being picked up by the robotic end effector, the robot can move relatively fast to put the part into the final ordering device.
Final ordering
Consider a basic ordering method and try to enhance this process to simplify packaging or further production steps.
Metrology
Depending on the complexity of the part, a metrology device can be inserted into the cell. Whether a camera that is measuring certain diameters or even probes directly on the end effector, use a measuring method that verifies the critical dimensions. Your process needs to be verified—choose a verification method that is adequate for your application. Metrology can be done afterward, but don’t wait too long to verify your process because the situation can change really fast. If, for example, a tool is broken in the machine magazine, you don’t want to have to redo the production.
Other tips
Like most robotic applications, you may want to do a couple of simulations before bringing a die cast into your machine frame, right? So companies, such as ABB, are developing software that are specific to machine tending operations. A program like this allows you to have a faster startup time and to, of course, reduce your risk of error.
Security is always a concern when talking about machine tending. Make sure to verify the applicable norms for industrial robots. Design the security perimeter taking into consideration your machine. In fact, maintenance is critical for the quality and functionality of your machine. Make sure your security devices allow the operator to change tools when necessary and to do complete maintenance when needed.
The machine-robot compatibility needs to be considered in the integration of your cell. Most of the time, the machinery is already in the shop, so choose an industrial robot that is well-suited to your machine controller. For example, if your 5 axis has a Fanuc controller, go with a Fanuc robot; the integration will be easier.
Floor management should also be considered in your robotization concept. Can you do your machine tending on two different machines using the same robot? Do you want to use a rail to move your robot from one machine to another? Is it more appropriate to use a robot that is upside down? Do you want to use a conveyor or not? These are all different questions that you need to ask yourself when you are thinking about machine tending. You want to reduce the footprint on your floor by being more efficient. Here’s an example of a robotic machine tending system that is using a rail to reduce the footprint in the shop.
Machine doors need to be automated too. This step is usually simple to integrate; recent machines are usually already equipped with this device.
The goal of this article was to cover the main principles of machine tending. Hopefully this gives you a couple of ideas on what would be good for your machine shop in an industrial automation context. To see what kind of end effector would best suit your application, take a look at our e-book on how to choose the right end effector.
1_2026_Siemens_UR_demo_CES2026.gif)

Leave a comment