Tool-Changer Brand
Here is our brand recommendation for tool changers: ATI, Schunk, Smartshift, Staubli...
Here is documentation about the Smartshift tool changer :
Smartshift Tool Changer Robotiq documentation
Smartshift UR link
What is the type of connection possible with the Robotiq Grippers ?
There are two couplings and connection that you could use. The GRP-CPL-062 coupling uses a M12 connection:

Or you can use the GRP-ES-CPL-062 coupling with an M8 connection:

Unfortunately, we don't provide any other connector. If these couplings don't fit to your tool changer, you will need to make a custom connector.
Safely changing the tool without any risks
Here is a link to the DOF article explaining key points (manual tool changing but it will be the same concern for automatic regarding electrical supply and communication).
We added also two script functions for the use of the gripper with a tool changer :


As mentioned in the descriptions of the script functions above, it is important to always turn on and off the power while using a tool changer. This action can be performed using the following URscript: set_tool_voltage(voltage). The voltage argument can be 0, 12, or 24. In the specific case of the Robotiq gripper, use 24 to turn the power on and 0 to turn it off.
To ensure a reliable tool change, Robotiq recommends using the following sequence in the program:
Connection of the grippers:- Physically connect the grippers
- Apply the required voltage using set_tool_voltage(24)
- Call the rq_reconnect_grippers(False) function to launch the reconnection process in the background of the program
- Perform the rest of the program
- Call therq_disconnect_grippers() function
- Turn off the voltage using set_tool_voltage(0)
- Physically disconnect the grippers
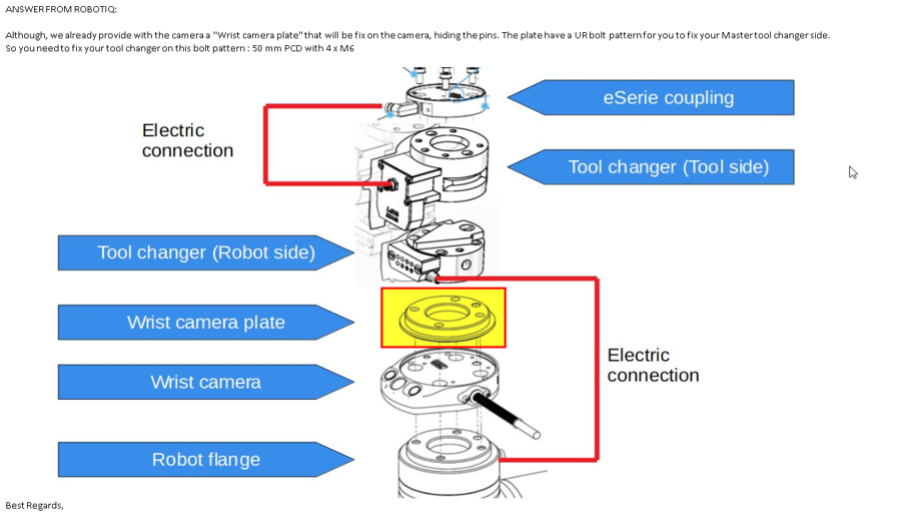
Camera settings with tool change example

Need help? Contact Robotiq Support